🚀 Getting Started with Utexo
Welcome to Utexo — your secure gateway between EVM and non-EVM blockchains.
This guide will walk you through everything you need to know to complete your first cross-chain transfer.
🔧 Step 1 — Wallet Setup
To interact with the Utexo, you’ll need:
- MetaMask – for Ethereum-compatible (EVM) networks
- Xverse Wallet – for Bitcoin network
📺 Follow our official video tutorials to install and configure both:
Once set up, head over to app.bridge.utexo.com, read and accept the disclaimer, and you’re ready to connect your wallets.
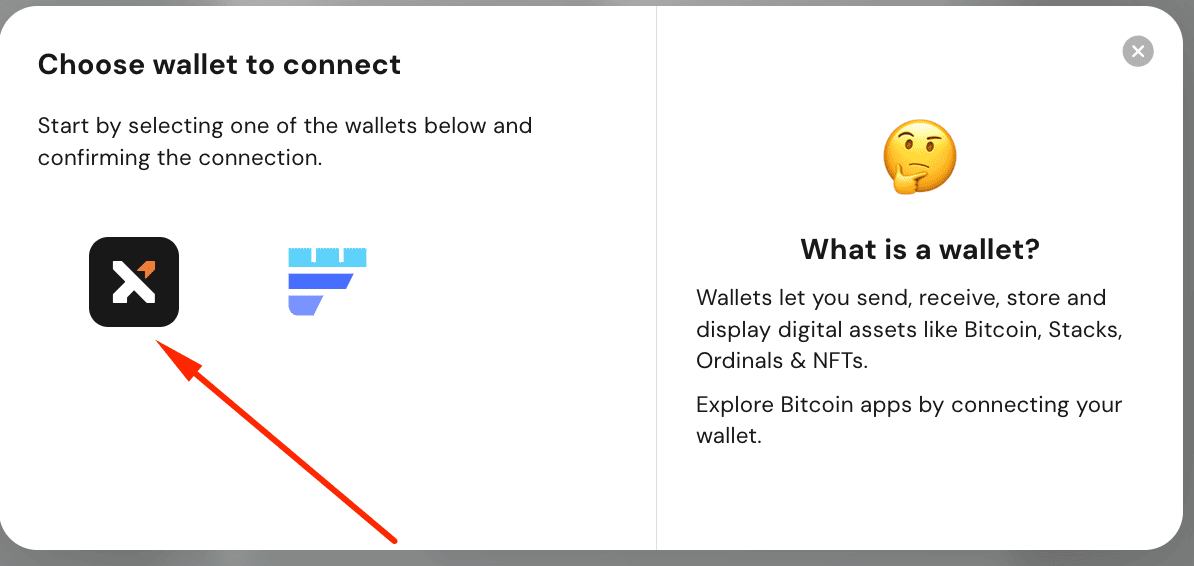
🔗 Step 2 — Connect Your Wallets
Click on Connect Wallet and follow the prompts:
- Connect your first wallet (MetaMask or Xverse)
- Click your wallet address at the top-right corner to connect the second wallet
💸 Step 3 — Make a Transfer
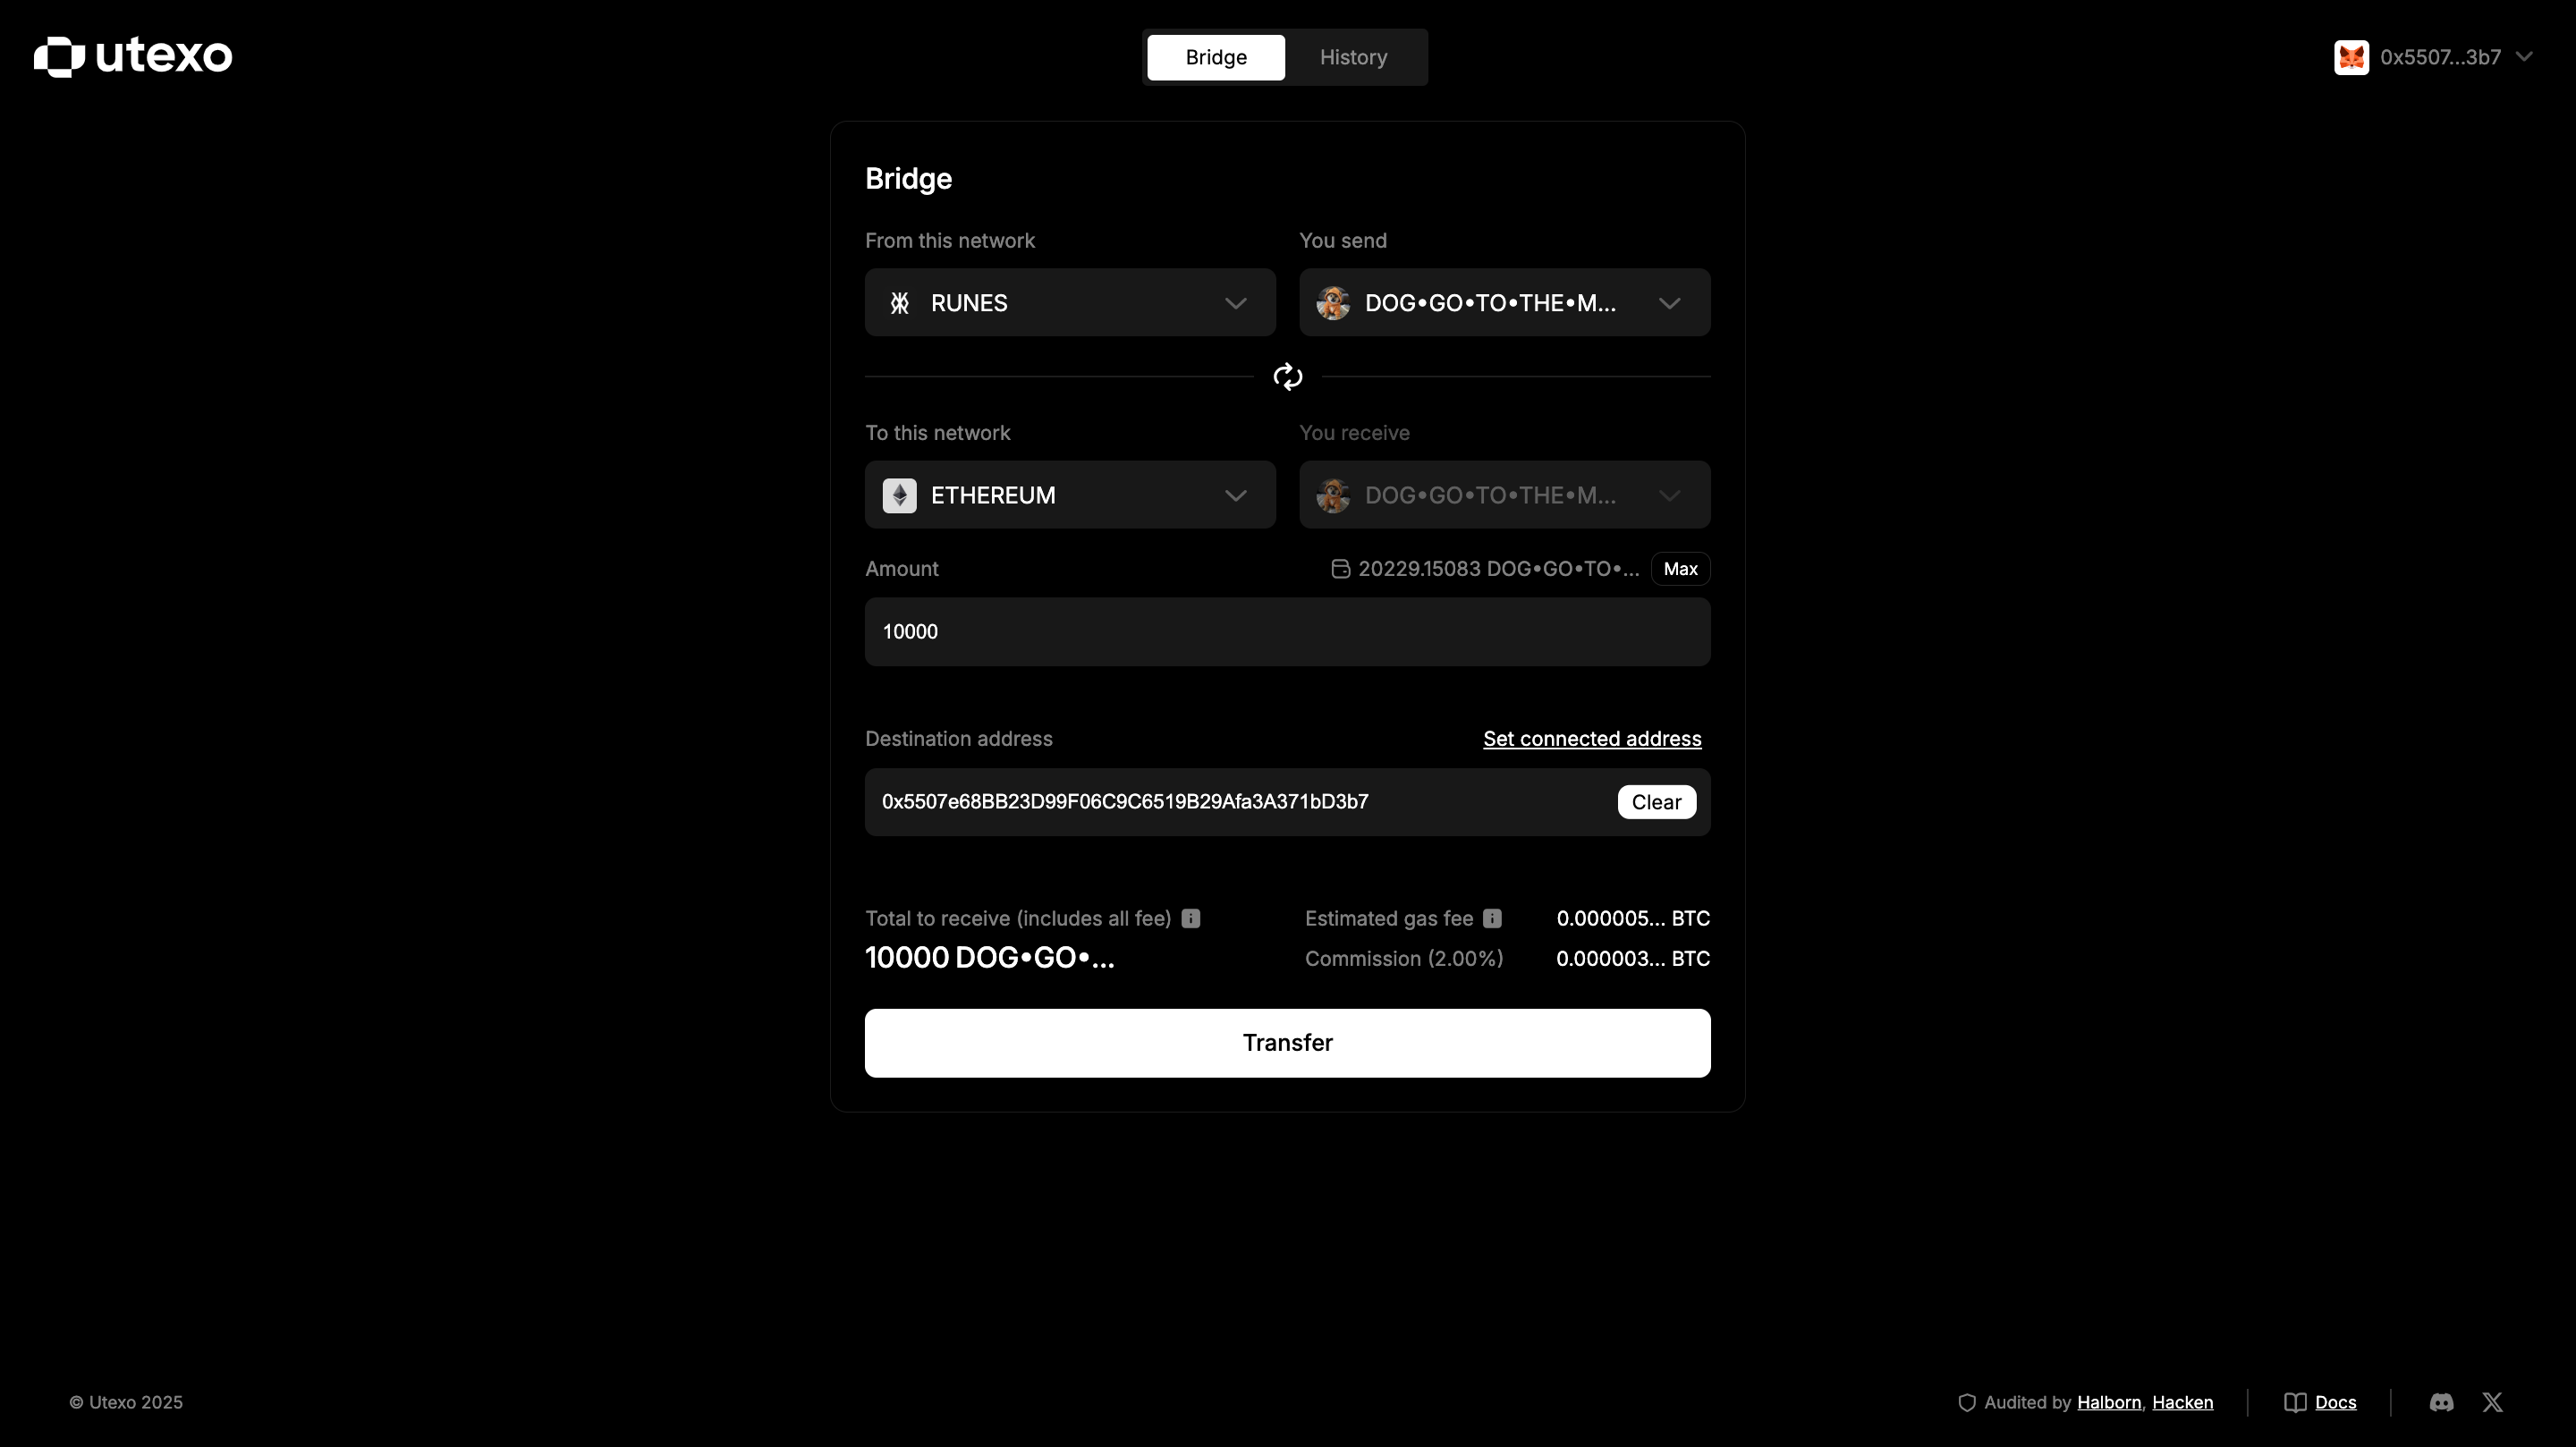
- Select the sender chain: Ethereum or Runes
- Choose the token: 🐕DOG•GO•TO•THE•MOON
- Select the destination chain: Runes or Ethereum
- Enter the amount and destination address
- Or tick “Send to your wallet” to autofill the address
After that, you'll see a transaction preview with the following details:
🧮 Preview Details (Ethereum → Runes)
- You will receive – estimated amount of 🐕DOG•GO•TO•THE•MOON after fees
- Estimated gas fee – paid in the source token based on live exchange rates
- Bridge commission – stable % fee charged by Utexo
Example:
If 🐕DOG•GO•TO•THE•MOON = $0.005 and the fee on the Bitcoin blockchain = $5.6,
you’ll pay approximately 1122.56 🐕DOG•GO•TO•THE•MOON in gas.
You’ll receive the wrapped 🐕DOG•GO•TO•THE•MOON token on Runes after fees.
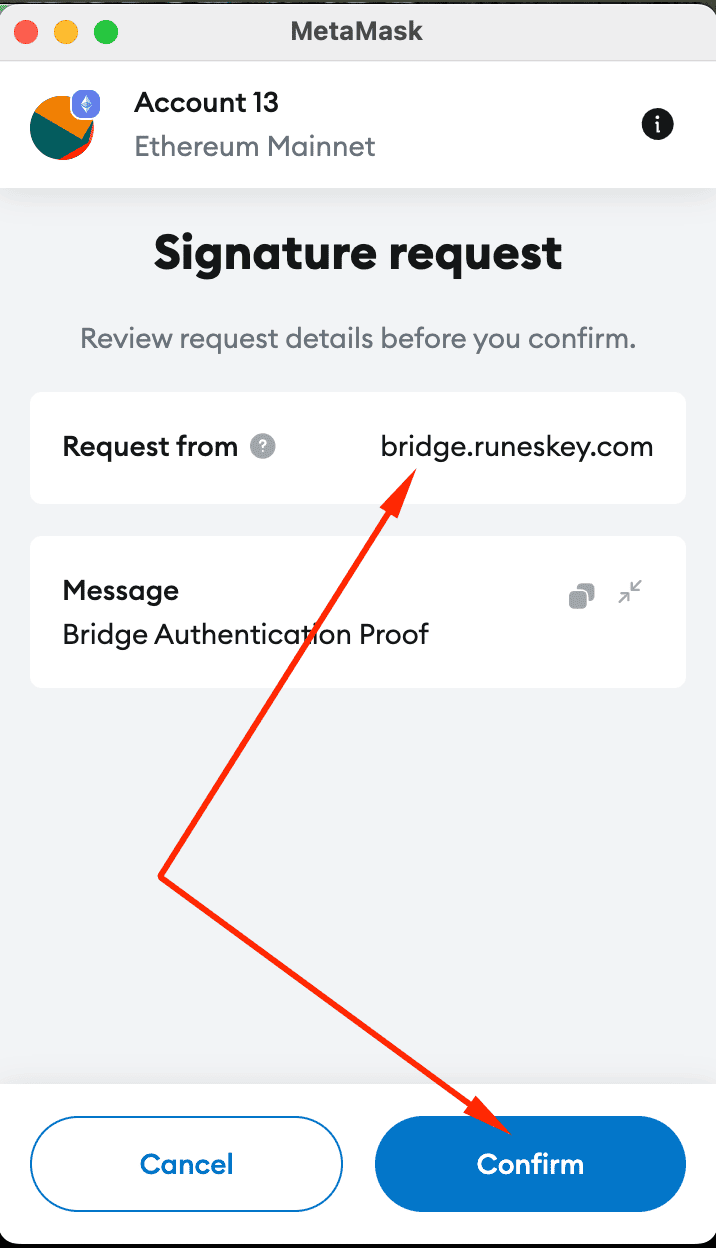
Click Transfer, then sign the transaction in MetaMask – and you're done.
⚠️ Note: Signing in MetaMask happens in two steps – first Approve, then Confirm the transaction.
👇 Follow the steps below to complete both actions:
Step 1: Approve token spending
You will first see a MetaMask popup asking you to approve spending.
Click Confirm.
Step 2: Close the approval window manually
After approval, you’ll see a message: “Your transaction is complete.”
Click Close extension.
Step 3: Confirm the actual transaction
⏳ Please wait 2–10 seconds. A new popup will appear.
When the second MetaMask popup appears, review the details and click Confirm to finish.


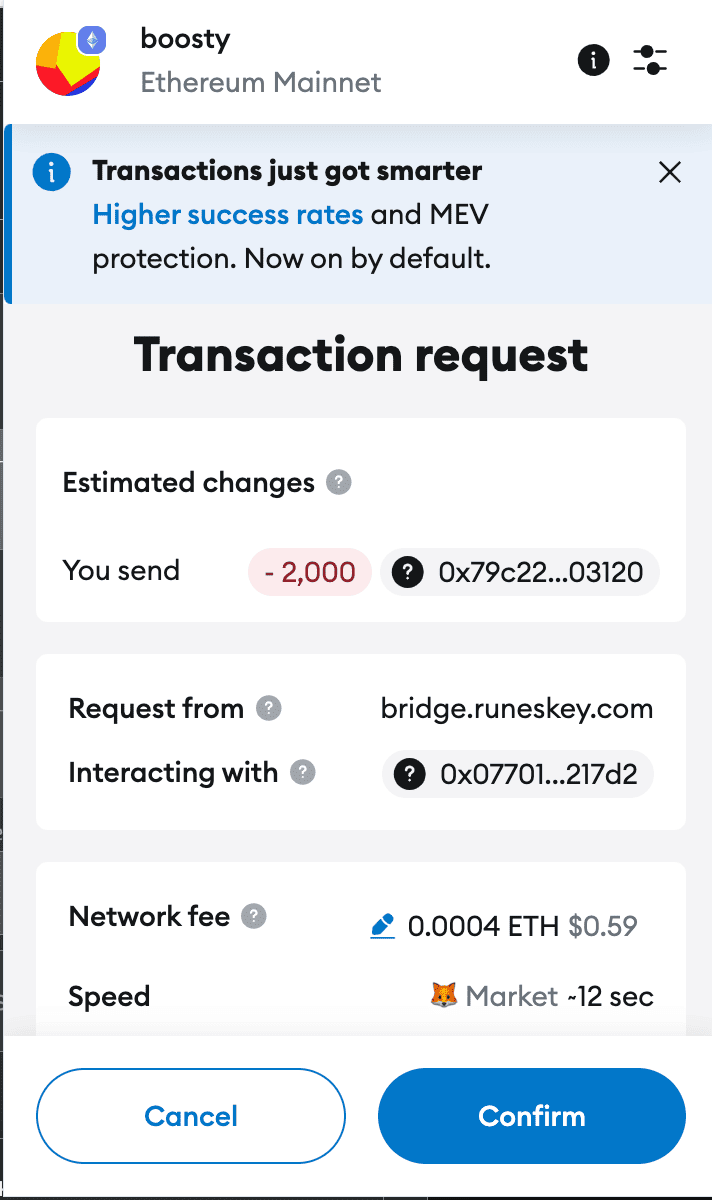
✅ Important: Do not close the tab or refresh the page until both steps are completed.
🧮 Preview Details (Runes → Ethereum)
- You will receive – the exact same amount of wrapped 🐕DOG•GO•TO•THE•MOON on Ethereum
- Estimated gas fee – paid in BTC, based on live exchange rates
- Bridge commission – stable % fee paid in BTC
Click Transfer, sign the transaction in your wallet, and you're done.
⚠️ Please select Xverse Wallet only! Other wallets are not supported.
🔍 Step 4 — Track Your Transfers
You can view the status under the History tab in the header menu.
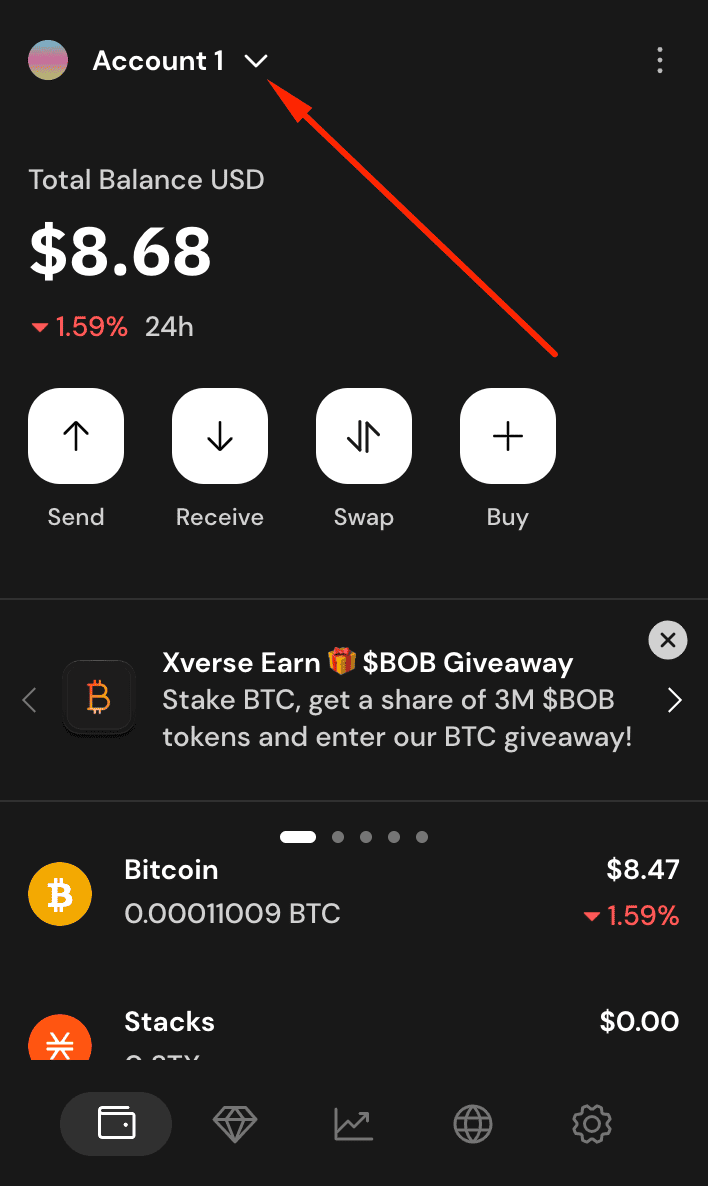
👤 Switching Wallet Accounts
For MetaMask:
- Disconnect the current wallet
- Switch account in the MetaMask extension and connect the new one to the Bridge — or disconnect the previous account from the Bridge first, then switch
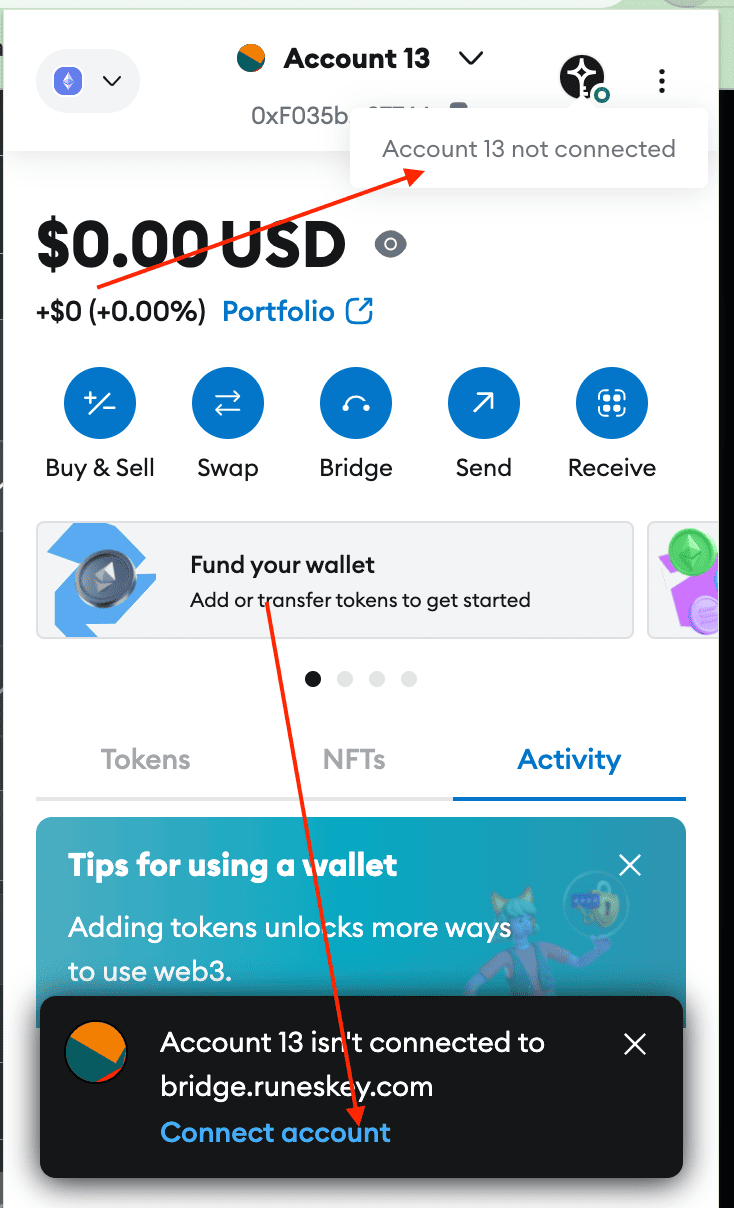
- Reconnect to Utexo
For Xverse:
- Disconnect your wallet
- Switch account in the extension
- Allowlist Utexo again
🎉 You're All Set!
Enjoy smooth and secure cross-chain transfers with Utexo.